Connect to Bitcoin Core
Connecting Sparrow Wallet directly to your own full node is the definitive way to achieve absolute financial sovereignty. By validating transactions locally, you stop relying on third-party servers and eliminate data leakage regarding your balances and public addresses.
Prerequisites
Before modifying files, ensure that your Bitcoin Core node is fully installed, synced, and operating as intended. If you are new to the desktop interface setup, we highly recommend going through our Quick Start Guide first to understand how Sparrow manages wallet files and basic layouts.
Bitcoin Core Setup
To let Sparrow communicate with your node via RPC (Remote Procedure Call), you need to append specific commands to your bitcoin.conf file. This text file dictates the node’s background behavior upon startup.
Depending on your operating system, the data directory containing bitcoin.conf is typically located here:
| macOS | ~/Library/Application Support/Bitcoin/ |
|---|---|
| Windows | %AppData%\Bitcoin\ |
| Linux | ~/.bitcoin/ |
Open the configuration file with a simple text editor. If it does not exist in the directory yet, simply create a fresh text document and save it under the name bitcoin.conf.
Local Node Architecture
If Bitcoin Core and Sparrow are running on the exact same machine, you only need to ensure that the RPC server is up and active. Paste the following line near the top of your config document:
If you are utilizing a modern Bitcoin Core deployment (version v25 or newer), it is highly practical to enable the block filter index. This allows Sparrow to perform much faster wallet rescans:
blockfilterindex=1
Remote Node Architecture
If your full node is located on a dedicated home server hardware or a separate desktop machine within your local network, you must explicitly instruct Bitcoin Core to accept external incoming connections and define authentication parameters:
rpcpassword=your_secure_password
[main]
rpcbind=127.0.0.1
rpcbind=192.168.1.50 # Change this to your node’s local static IP
rpcallowip=127.0.0.1
rpcallowip=192.168.1.0/24 # Allows devices on your local subnet
Transaction Indexing
If you have enough SSD storage capacity, we recommend building a comprehensive transaction index. This provides Sparrow with instantaneous access to generic transaction data:
Once you save your changes to bitcoin.conf, completely restart your Bitcoin Core application for the fresh operational parameters to take effect.
Sparrow Connection Setup
Once your background node finishes its synchronization loop, launch Sparrow, open the File menu, select Preferences, and click on the Server tab in the left panel. Toggle the Server Type to Bitcoin Core.
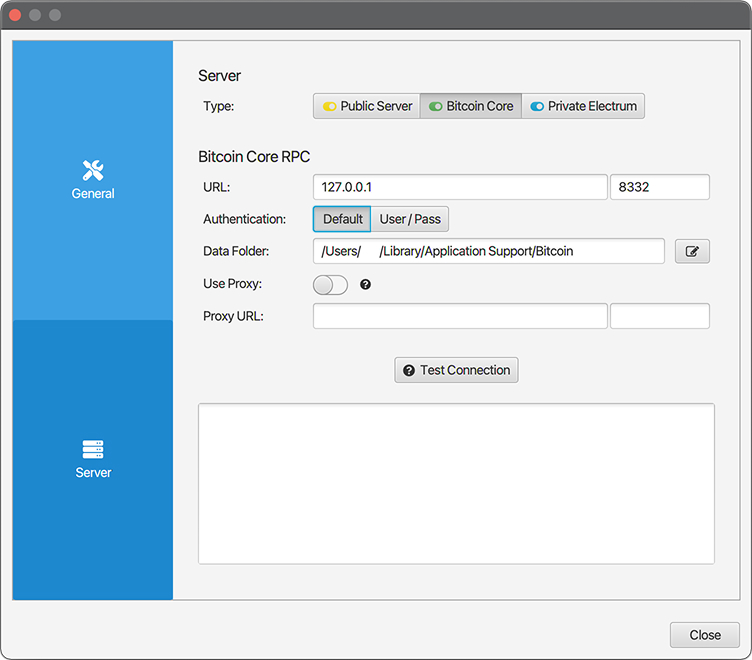
If Bitcoin Core is running on the same computer, leave the Authentication set to Default. Sparrow will automatically locate the necessary cookie file in the standard data folder. There is no need to manually enter usernames or passwords for local setups. If you changed the default data folder for Bitcoin Core, be sure to select that new folder in the Data Folder field.
Testing and Validation
Click on Test Connection to initiate a validation check. If everything is configured correctly, you will see a green checkmark. If the indicator turns red, refer to our troubleshooting FAQ to resolve connection issues.
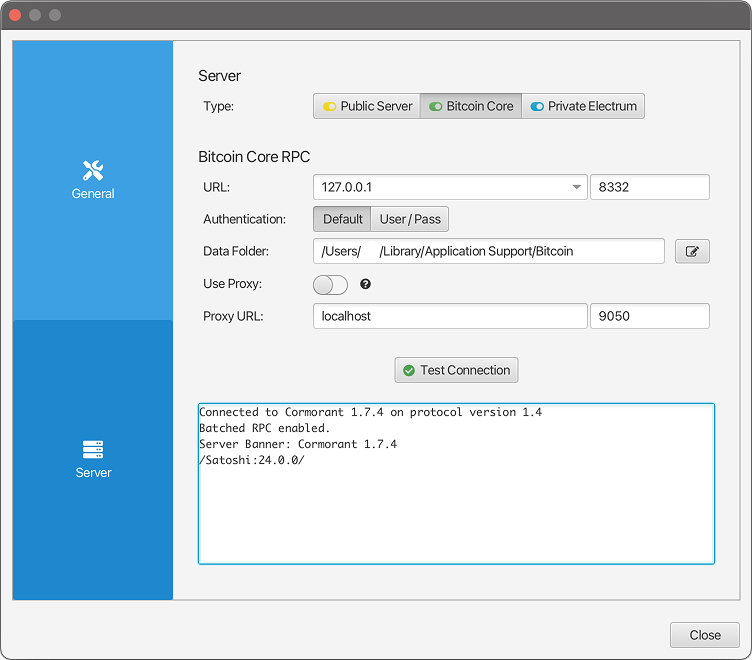
Pay attention to the log box at the bottom. A successful handshake will display the protocol version (e.g., /Satoshi:24.0.0/), confirming that Sparrow is actively communicating with your node daemon. Close the preferences window to proceed.
Importing and Scanning
Navigate to File -> New Wallet to configure your profile. When importing an existing wallet with a transaction history, setting the correct parameters is crucial for performance.
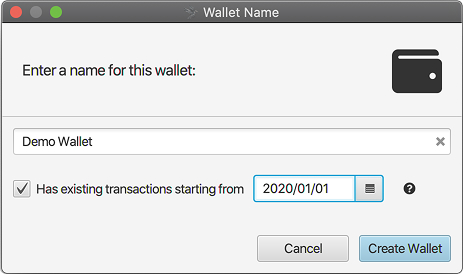
Ensure you check the Has existing transactions starting from box and input a date slightly before your very first transaction. Scanning the entire blockchain from 2009 is inefficient and time-consuming. Setting a realistic “birth date” for your wallet drastically speeds up the initial block filter rescan.
Click Create Wallet, complete your keystore setup, and hit Apply. Sparrow will now request Bitcoin Core to scan the ledger for your specific addresses.
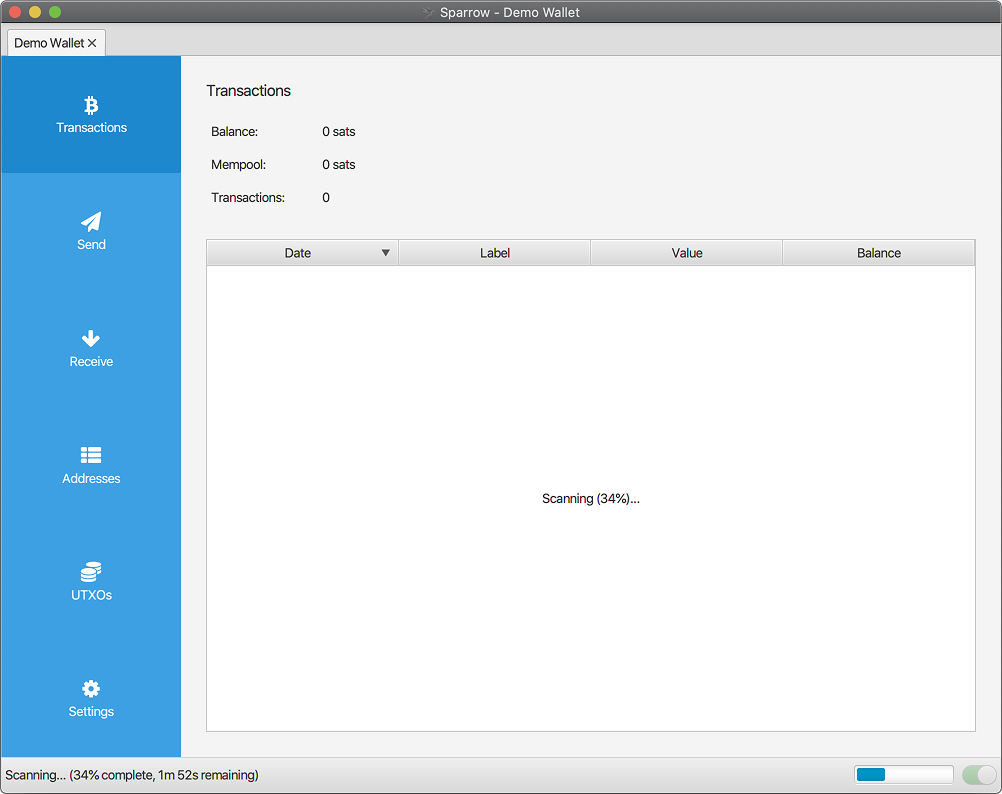
A progress bar will appear at the bottom of the interface, displaying the scanning percentage and estimated time remaining. Do not interrupt this process. Once the bar reaches 100%, your complete transaction history and balances will populate securely, entirely verified by your own hardware.